
ART RESOURCES / ART AND WELLNESS BLOG

Why should we teach 1 and 2 point perspective ?
Perspective drawing how to and why ? Drawing is a form of artistic expression that captures the essence of our 3D world on a 2D surface. Teaching perspective drawing to high school students is a valuable skill, as it enhances their artistic abilities and fosters critical thinking and problem-solving skills. Offering your students a Perspective drawing class that focuses on 1 and 2 point perspective are fundamental techniques that help students understand how to create depth and dimension in their artwork. This blog will explore the principles of one and two-point perspective and provide a guide on how to teach these concepts in an easy and effective way to high school students.
The Basics of Perspective Drawing
Before diving into perspective drawing assignments, it is important for students to understand the basic concepts of perspective drawing.
- Horizon Line: The horizon line is an imaginary line that represents the viewer’s eye level. It is often referenced as a line the divides the earth from the sky. It runs horizontally across the page and is the main point of reference for perspective drawings.
- Vanishing Point(s): Vanishing points are points on the horizon line where lines appear to meet. In 1 point perspective, there is one vanishing point, while in 2 point perspective, there are two vanishing points.
- Orthogonal or Converging Lines: These are diagonal lines that connect points on the object to the vanishing point in 1 point perspective or points in two point perspective. They help create the illusion of depth.
How to Draw One Point Perspective
One-point perspective is an excellent starting point for teaching high school students perspective drawing. It is relatively straight forward and helps students grasp the core concepts.
Materials Needed:
- Drawing paper
- Pencils (Keep it sharp)
- Ruler (Don’t attempt free hand perspective drawings for a more accurate result)
- Eraser
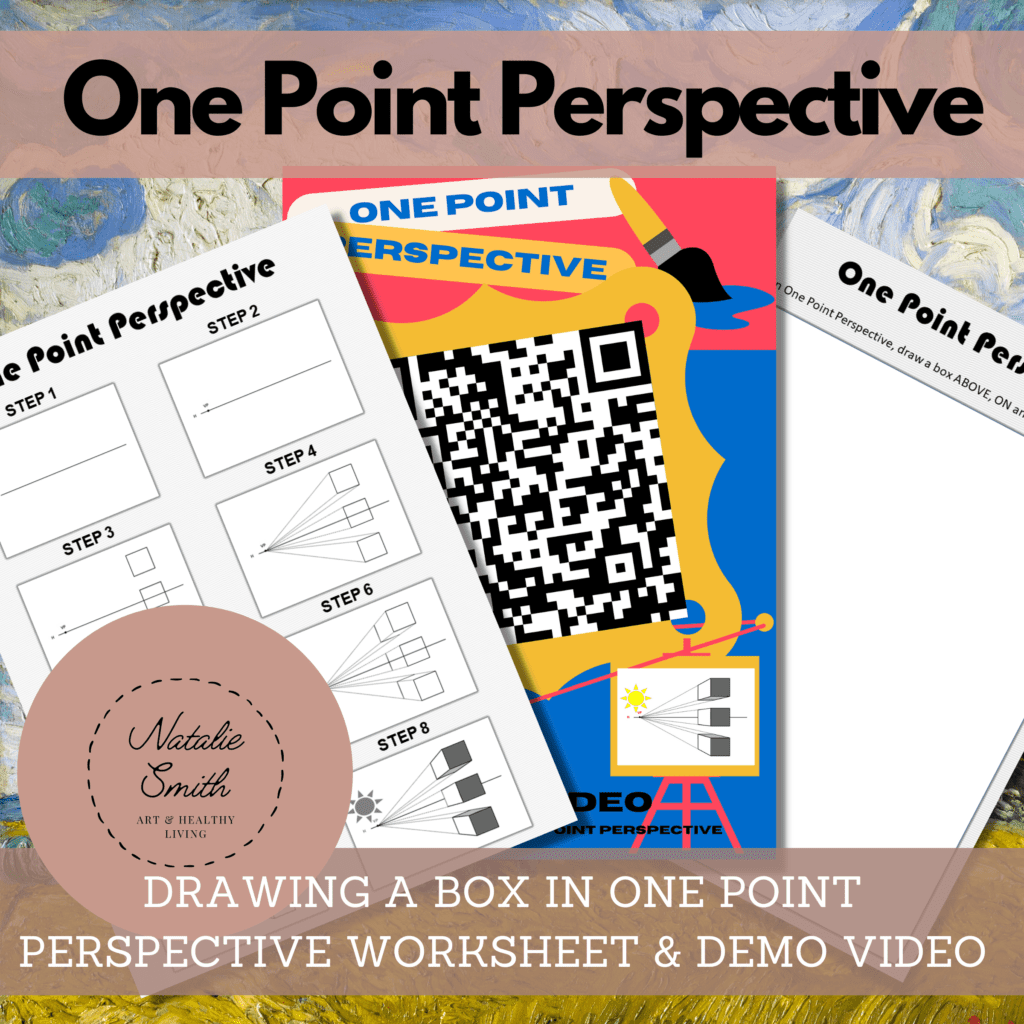
1 Point Perspective Steps
Step 1: Setting Up the Drawing
Begin by drawing a horizontal line (horizon line) in the middle of the paper. Then, draw one vanishing point on the horizon line.
Step 2: Creating the Cubes
Start by drawing a square or rectangle on the paper. I like to draw three on the right or left of the page when teaching it for the first time as it keeps it simple and it makes it easy to assist the students if you have a large class. Draw three cubes, one above, one on and one below the horizon line. Connect the corners of the square/rectangle to the vanishing point using orthogonal/converging lines. These lines give the illusion of the object receding into the distance.
Step 3: Adding Depth
To create the sides of the cube, draw vertical and horizontal lines along the orthogonal/converging lines. This will complete the three-dimensional look of the object. Erase any unnecessary lines to clean up the drawing.
Step 4: Experiment
Encourage your students to experiment with different objects and shapes using the one-point perspective. They can create One point perspective of a bedroom, streets, buildings, or interior scenes. The key is to help the students understand how lines converge towards the vanishing point.
Step 5: Shading and Detailing
Once students are comfortable with the basics, they can add shading and details to their drawings to make them more realistic and engaging.
What is a two point perspective drawing ?
2 point perspective drawing include additional complexity, as it involves two vanishing points on a horizon line. This technique is often used to create dynamic and realistic scenes.
Materials Needed:
- Drawing paper
- Pencils
- Ruler
- Eraser
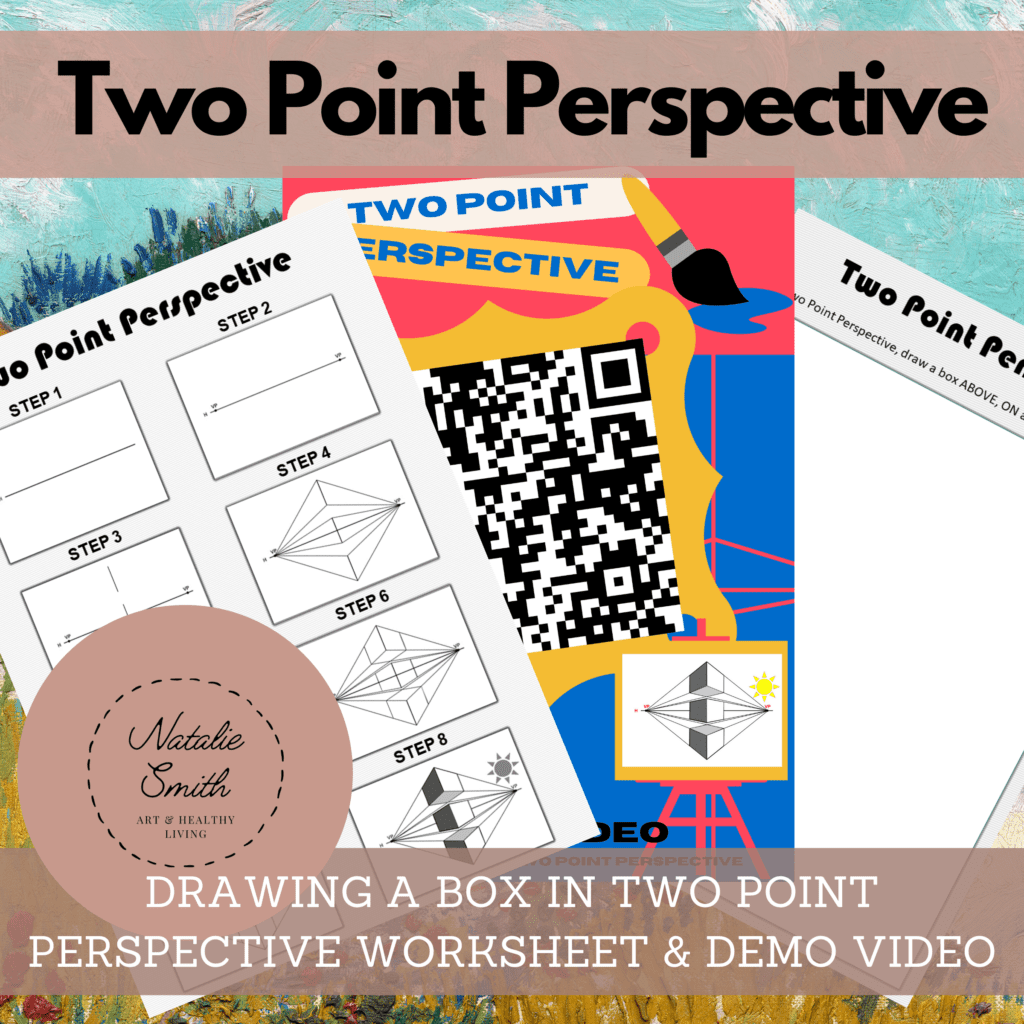
How to Draw 2 Point Perspective
Step 1: Setting Up the Drawing
Like with one-point perspective, start by drawing a horizon line across the middle of the paper. This time, place two vanishing points, one on the left and one on the right.
Step 2: Creating the Cubes
Begin by drawing a three vertical line in the middle of the paper. One above, one on and one below the horizon line. This will represent the front corner of the cubes. Draw the bottom and top lines of each cube, connecting them to both vanishing points. These lines create the depth of the object.
Step 3: Adding Depth
To complete the box, draw orthogonal/converging lines from the top and bottom corners of the front face to the opposite vanishing points.
Step 4: Experiment
Encourage students to practice by drawing various objects and scenes using two-point perspective. They can create roads, buildings, and interiors. Challenge your students to figure out how to draw a room in 2 point perspective. This technique allows for more dynamic and exciting compositions.
Step 5: Shading and Detailing
Once students are confident with the basic perspective skills, they can add shading, and details to their two-point perspective drawings. This will give their artwork a more realistic effect.
Tips for Effective Teaching
Teaching perspective drawing to high school students requires patience, practice, and effective strategies. Here are some tips to ensure successful learning:
1. Start Simple
Begin by using basic shapes. Slowly progress to more complex images. This helps build students’ confidence and understanding of perspective principles.
2. Demonstrate and Practice
Show students how to draw in perspective through demonstrating step-by-step. Allow them ample time to practice and perfect their new skills.
3. Use References
Encourage students to study and identify real-life objects, photos, or artworks that use perspective. Challenge them to find both 1 and 2 point perspective in spaces, rooms and objects around them. Analysing existing work can help them understand how perspective is applied and inspires the students.
4. Peer Assessment
Allow the students to sit in pairs and assess each other’s drawings to promote an environment where students can offer feedback on each other’s work. This will allow the students to learn from each other and see a different perspective. Providing a perspective drawing rubric to the student can provide them with a basic outline of what to look for and to get them started.
5. Incorporate Art History
Explore the history of perspective in art, where it began in the Renaissance era, through the years and how it has developed in contemporary art today. This can help students appreciate the significance of these techniques.
6. Digital Tools
Introduce digital art software or apps that allow students to practice perspective drawing. These tools can be engaging and fun. If the students have access to an iPad, procreate is a wonderful tool (there is a small once off fee for this app but it is well worth it). Google drawings is another fantastic option, it is free and easy to use.
7. Printable One Point Perspective Worksheet
Use a printable one point perspective worksheet to guide your students through the basic 1 point perspective steps.
8. Two Point Perspective Worksheet
Use a two point perspective worksheet to guide the students through the basic 2 point perspective steps.
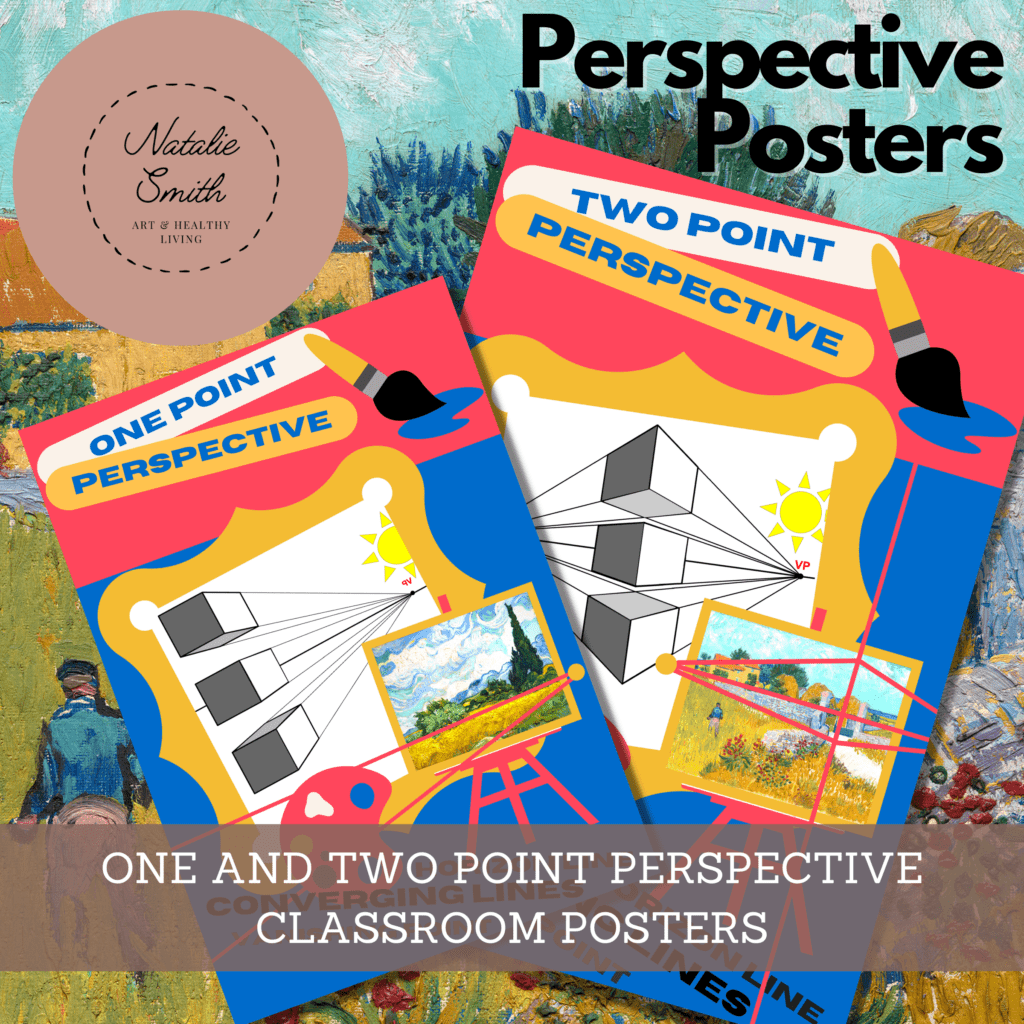
Making Perspective Fun and Creativity
1. The Power of Visual Aids
Start with eye-catching visual aids, This will introduce the concepts of 1 and 2-point perspective to the students. Use images, videos, and presentations that showcase famous artworks or architectural wonders. Discuss how perspective is used in real life, in photography and in art to create the illusion of depth.
2. Perspective Scavenger Hunt
Organize a perspective scavenger hunt that takes students on a journey around the school or even on a city outing. Divide the students in groups and provide them with a list of items to find that relate to perspective. For example, they can search for parallel lines, orthogonal lines, or objects that seem to disappear into the distance. This activity encourages students to observe the world around them with a new perspective. Encourage them to take photos of each item or scene to use as reference images to draw in class.
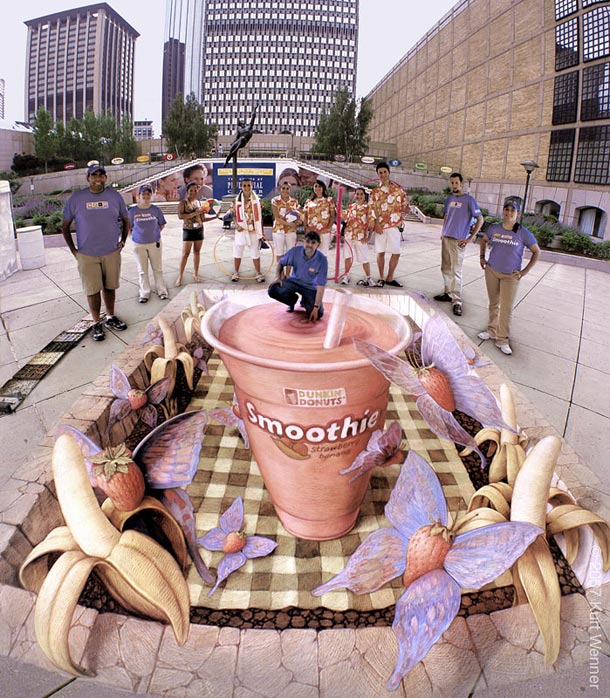
3. 3D Sidewalk Chalk Art
Take the perspective lesson outdoors by creating a sidewalk chalk art session. Provide students with chalk and let them create their own 1 and 2 point perspective drawings on the sidewalks or parking lot. Encourage them to draw objects that seem to pop or grow out of the ground or recede or fall into the distance. This is not only fun but also a fantastic way to apply the principles of perspective. Have a look at these inspiring 3D Sidewalk Chalk Artworks, they will wow your students!
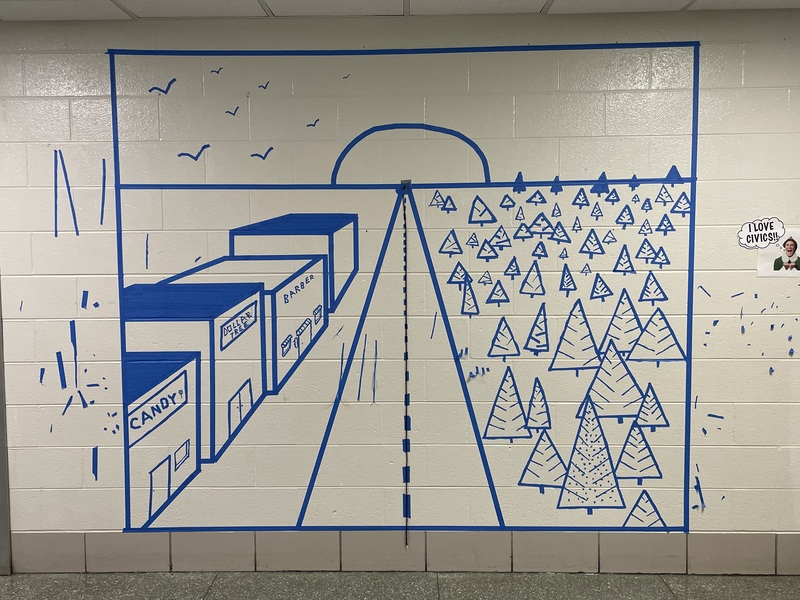
4. Collaborative Mural Project
To teach perspective, consider starting a collaborative mural project using tape (This makes it easy for the school to approve as it can easily be removed once complete). Divide the class into small groups and assign each group a section of a wall to work on. Instruct them to create a mural that features either one or two-point perspective. This project not only allows students to practice their drawing skills but also fosters teamwork. These 7 tips can assist in making tape murals a success.
5. Fun Challenges
Host a perspective drawing challenges, where students have to create imaginative scenes. Set specific themes or scenarios, such as “Superhero World in 2 point perspective”, “An Alien Invasion in 1 Point Perspective” or “A Magical Forest in 2 Point Perspective” or a “Old Western Town in 1 point perspective.” These challenges can make learning perspective principles less rigid and more exciting.
6. Student Art Showcase
Encourage students to create their own perspective artworks and organize a school- art show. A show will celebrate their new found skills and creativity and can motivate students to put extra effort into their work. This event can educate the school community about the importance of art. Click here for some helpful art show tips.
Conclusion
Teaching high school students one and two-point perspective doesn’t have to be a dry, technical exercise. By infusing creativity, exploration, and fun into the learning process, educators can make perspective drawing an engaging and memorable experience. When students learn with enthusiasm and excitement, they are more likely to develop a strong foundation in perspective drawing and carry these skills with them into their artistic endeavours. So, embrace these creative teaching methods and watch your students transform into perspective artists who see the world with a new, artistic perspective.